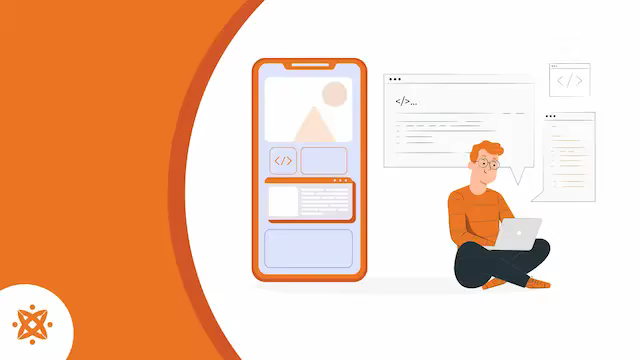
How to Create an App?

Co-Founder
To build an app, you need to define your goals, conduct research, design the interface, develop core features, and plan a launch strategy.
Building an app the right way helps boost your brand reputation and increase customer engagement.
The cost to create your app will depend on factors, including team size, resources required, and development time affecting the costs of app development.
Developing an app on your own is a cost-effective solution especially if you have the right skills. However, the benefits to hiring an experienced app developer outweighs the initial investment.
Hiring app developers provides expertise, customization, and faster development time. According to a study titled “What Does a Software Developer Do,” published on the Rasmussen University website by Hope Rothenberg, experienced developers bring specialized skills that can prevent costly mistakes in the app development process.
Step 1: Define Your Goals
Defining your app’s goals involves identifying the specific problem your app will solve for users and understanding audience needs. Clear goals guide every decision in the app-building process, from design to launch, ensuring the app is user-centered and effective.
Use tools like Extensio, Lucidchart, and surveys to refine and prioritize goals, considering factors such as target audience, essential features, and monetization strategy.
Step 2: Conduct Market Research
Conducting market research is crucial for understanding the competitive landscape and shaping a unique mobile app development strategy.
Use tools like Lookback.io and Maze to gather user insights, helping you identify competitors’ strengths and weaknesses so you can navigate the mobile app development process effectively.
Additionally, use ASO tools to analyze competitors’ features, rankings, and user reviews. This research enables you to spot opportunities and refine your app’s value proposition. Pay close attention to how competitors utilize app descriptions, keywords, and screenshots to attract users.
Step 3: Plan Your App’s Features and Functionality
Defining your app's features and functionality involves prioritizing elements that make the app intuitive, easy to navigate, and customizable. Key features include speed, simplicity, and high-resolution images to ensure an engaging user experience.
Consider cross-platform functionality to make the app compatible with major operating systems like iOS and Android. Integrate social media links and push notifications to provide users with relevant, personalized updates, enhancing long-term engagement.
Plan for future updates and scalability to create software that remains adaptable over time. Wireframing and prototyping stages allow you to visualize user flow and identify potential issues in the application design.
Use wireframing tools such as Balsamiq, Sketch, Real World Test, and Core Animator to refine the user interface (UI) and user experience (UX) design. Collaborate with developers and designers during this step to ensure cohesive and effective feature planning.
Step 4: Design User Interface (UI) and User Experience (UX)
The User Interface (UI) comprises an app’s visual elements and design components that users interact with, while User Experience (UX) refers to how effectively users navigate the app.
Transform the prototype and wireframe into an intuitive, visually appealing design that enhances usability and user satisfaction. A well-designed UI boosts engagement, retention, and customer satisfaction. Prioritize accessibility to ensure users of all abilities can navigate the app effectively. UI also reflects your brand’s identity, creating memorable experiences.
Use tools like Sketch, Adobe XD, UXPin, Figma, and InVision Studio to design the UI. Key UI components include layout, color scheme, typography, and images, all contributing to a cohesive and engaging app design.
Step 5: Choose The Right Technology Stack
Choosing the right technology stack entails analyzing development approaches and selecting tools, languages, and platforms that best fit your app’s requirements. Start by deciding whether your app will target iOS, Android, or both.
For instance, iOS offers a secure, user-friendly environment, while Android provides broader compatibility and features like Google Maps.
Consider language and platform options, such as Kotlin for Android, Swift for iOS, and React Native for cross-platform development.
Select an agile or waterfall methodology based on your project’s requirements. Conduct thorough testing on user acceptance and integration to ensure functionality and address any issues early on. This step brings the app’s design to life, giving you greater control over functionality and the flexibility to customize features.
When choosing between native and cross-platform development, evaluate your budget, timeline, and technical requirements. A well-chosen technology stack ensures that your app meets specific needs, resulting in a high-quality, efficient application.
Step 6: Develop the App
Developing the app involves coding and translating the UI design into functional software. Start by addressing the app’s front-end and back-end components. The front end consists of elements users interact with, while the back end manages functionality behind the scenes.
For a cohesive end product, make sure you coordinate front-end and back-end work processes for a cohesive end product. Tools such as Appium, Espresso, Selenium, Lambda Test and ApacheJMeter help drive native and mobile applications.
Set up a test environment to verify the database server, front-end environment, operating system, and network functionality.
If targeting both iOS and Android, consider using cross-platform frameworks. Follow best practices and maintain clean, well-documented code to simplify future updates and ensure long-term app stability.
Step 7: Test the App Thoroughly
Testing is essential to identify and fix errors, bugs, and other issues before launching the app. Conduct quality assurance (QA) throughout development to ensure a smooth and reliable user experience. Use tools like Appium, Katalon, Kobiton, ACCELQ, Selendroid, MonkeyTalk, TestGrid, and testRigor for comprehensive testing.
Some of the things to consider during testing include:
- Device Compatibility: Use tools like BrowserStack or Browsera to ensure compatibility across web browsers, mobile devices, databases, and operating systems.
- Front- and Back-End Functionality: Verify that the app’s data and infrastructure support smooth operation. Check for broken links, images, or fonts on the front end, and server or database errors on the back end.
- Installation and Storage: Ensure the app’s file size allows fast downloads and smooth operation on the target operating system.
- Application Type: Perform integration or unit testing to verify functionality across both mobile and web platforms if applicable.
- Security Optimization: Conduct penetration testing, input validation, and SSL/TLS layer verification to secure source code and ensure HTTPS compliance.
Step 8: Prepare for Deployment
App deployment is the process of making the app available to users. Test the app with a diverse group of users to understand their needs and confirm that the app meets expectations.
Use tools like Visual Studio Code, Xcode, and Android Studio to test and refine key features before launch. Track user behavior to identify areas for improvement and modify any confusing elements.
Ensure smooth app performance when handling large files or data volumes. Minimize app size and optimize battery usage to reduce download times and prevent performance issues.
Step 9: Launch the App
Launch the app by establishing market presence and deploying on the iOS App Store and Google Play Store to maximise reach. Marketing campaigns promote the app to attract users and drive revenue. Key performance indicators (KPIs) and user feedback measure app success and guide improvements.
Testing occurs using Appium, Android Emulator, iOS Emulator, and BrowserStack before launch, with TestGrid, Selendroid, and Calabash for quality assurance. Performance analysis, including user engagement, usage metrics, and retention rates, was evaluated throughout the launch app process to determine app effectiveness.
How to Build a Mobile App?
To build an App, follow the six steps listed below.
- Set Up Development Environment. Download Android Studio from Android.com, install the SDK, and configure the emulator for testing.
- Define App Requirements. Outline app features, user flow, and design specifications before coding.
- Create New Project. Launch Android Studio, select "New Project," enter app name, package details, and minimum API level.
- Design the User Interface. Access activity_main.xml, switch to Design tab, drag buttons and text fields from Widgets onto canvas.
- Code the Functionality. Edit MainActivity.java to add event listeners, implement button actions, and connect backend APIs.
- Test and Publish the App. Run emulator, verify features work, fix bugs, and upload to Google Play Store following mobile app best practices.
How To Build an Android App?
To build an Android app, follow the six steps listed below.
- Install Android Studio and SDK Tools. Download Android Studio from Android.com, install the Android SDK, configure emulator settings, and verify system compatibility.
- Document Feature Requirements and UI Flow. Sketch wireframes, list app functionalities, define user interactions, and establish design guidelines for development.
- Set up a new Android Project in the IDE. Open Android Studio workspace, click "New Project," input application name, configure package name, select API level, and finalise project setup.
- Create Layout Files with XML and Widgets. Navigate to activity_main.xml, access the Design editor, drag UI components from the Widgets palette, and arrange them on the screen canvas.
- Write Java Logic and Event Handlers. Open MainActivity.java class, implement button click listeners, add business logic, integrate REST APIs, and handle user input responses.
- Debug Using Emulator and Publish Globally. Launch Android emulator from the toolbar, perform testing, resolve issues, compile signed APK file, and upload to Google Play Store with Android app compliance.
How to Build an iOS App?
To build an iOS app, follow the five steps listed below.
- Install Xcode and iOS Development Tools. Download Xcode from the Apple Developer website, install SDKs, configure simulator devices, and verify macOS requirements.
- Map App Functionality and User Experience. Create user flow diagrams, define feature scope, design wireframes, and document interface requirements for implementation.
- Establish a Swift Project in Xcode. Launch Xcode, select "Create New Project," name the application, choose Swift as the programming language, and target the iPhone platform.
- Design Screens Using SwiftUI Framework. Build view layouts with SwiftUI, add interactive buttons and text input fields, implement navigation controllers, and style UI elements using iOS app design patterns.
- Test on Simulator and Submit to App Store. Run iOS simulator, validate all features, fix bugs, archive the app bundle, and submit through App Store Connect for Apple review and distribution.
How to Build a Desktop App?
To build a desktop app, follow these key steps:
- Step 1: Create a Concept and Design the Application. Understand your target audience and use tools such as Moqups, Mockplus, Adobe XD, and Mockingbird to design your application. Make sure your design is functional, usable and responsive.
- Step 2: Choose a Programming Language. Choose from programming languages such as JavaScript, HTML/CSS, SQL, Python, TypeScript, and Node.js.
- Step 3: Select a Development Framework. Choose the right development platform to ensure you have access to all the tools required to create a high-quality desktop application.
- Step 4: Install an IDE. Install an integrated development environment (IDE). Installing IDE like XCode, and Visual Studio helps you write better codes, save time, and identify errors.
- Step 5: Test Your Application. Test your desktop application by confirming whether all the features are working as expected. Get feedback by sharing your application with real users. Seek the opinions that offer suggestions for improvement.
- Step 6: Distribute the App. Distribute your app by directing customers to download it or using the Microsoft Store, macOS users, or the Apple Store.
How to Build a Progressive Web App?
To build a progressive web app, follow these key steps:
- Step 1: Plan Your Web Application. Determine whether you want to build an advanced PWA (Progressive Web App) with enhanced features or a basic PWA with core functionalities.
- Step 2: Build the App Shell. Create a basic HTML layout and develop a separate CSS file to define the layout, colors, and other visual properties. Use tools such as Gulp or Webpack to automate the generation and optimization of the app shell files.
- Step 3: Develop the Front End of Your PWA. Use modern technologies like HTML5, CSS3, and JavaScript frameworks to build responsive and interactive user interfaces. Use emulators like BlueStacks and Phoenix OS to test across iOS, Android, and desktop.
- Step 4: Implement the Service Workers. Service workers are features that enable ‘work offline’ functionality, background synchronization, and push notifications. Implement service workers like JavaScript files so your PWA can function even when the user is offline.
- Step 5: Create a Web App Manifest. A web app manifest is a file that provides metadata about your PWA, including its name, description, icons, and preferred display mode. Create a manifest file and include the start URL, display orientation, and theme color.
- Step 6: Add Push Notifications. Integrate push notification functionality using web push APIs and service workers. Implement subscription management, personalized notifications, and analytics tracking to deliver timely and relevant messages to your users.
- Step 7: Test and Deploy your Progressive Web Application. Thoroughly test your application across various devices, and browsers using tools like BrowserStack or Sauce Labs. Deploy your PWA to a reliable hosting platform such as Firebase Hosting.
How to Build a No-Code App?
To build a no-code app, follow these steps:
- Step 1: Explore Various Platforms. Research popular platforms such as Bubble, Adalo or Thunkable and pick the one that meets your needs and goals. Choose from open-source or other available no-code platforms for free.
- Step 2: Sign up. Sign up for platforms that offer free trials to familiarize yourself with its features and tools. Some of these platforms include Bubble, AppSheet, KISSFLOW among others.
- Step 3: Start Building. Start building your application using pre-built templates and drag-and-drop tools. Examples of tools include Adalo, Flutter Flow, Draftbit and Glide.
- Step 4: Test Your Application. Thoroughly test your application to ensure it functions well. Use tools such as AccelQ, Draftbit, Airtable, and Thunkable Live to troubleshoot and fix any issues.
- Step 5: Launch Your App. Launch your app and use it in your business or personal projects. Regularly update your application to ensure its functioning smoothly.
How To Build an App With AI?
To build an app with AI, you need to define the problem and choose an AI technology. The main options for building an app with AI are explained below:
How To Build an App With Chat GPT?
To build an app with Chat GPT follow these steps:
- Step 1: Open the GPT Builder. Open the GPT Builder by loading up ChatGPT on the OpenAI website and click the Create button. Create and configure the pane.
- Step 2: Refine Your GPT. Configure your GPT to build the app from scratch. Ask the GPT Builder for help with generating ChatGPT app ideas.
- Step 3: Configure the Technical Specifications. Create the technical specifications such as the core features, user profiles and item listings. Make the app interface more user-friendly by assigning some prewritten buttons.
- Step 4: Upload Files and Launch. Link relevant APIs such as YouTube API and Twitter API or upload additional files for the GPT to interact with via the Configure tab. Finally, launch and test the app.
How To Build an App With Claude?
To build an app with Claude, consider these steps:
- Step 1: Generate HTML+JS Artifact with Claude. Create the HTML and JavaScript artifact by starting a conversation with Claude asking it to generate the HTML and JavaScript code for your app.
- Step 2: Set Up Your Development Environment. Install Node.js, Android Studio, and Apache Cordova from the official website. Set up your Android development environment variables.
- Step 3: Create a Cordova Project. Open your terminal prompt, navigate to the directory where you want to create your project and run the command: cordova create MyApp com.
- Step 4: Integrate Claude’s Artifact. Integrate the HTML and JavaScript code generated by Claude into your Cordova project and replace the contents of index.html with the HTML code generated by Claude..
- Step 5: Configure Your Android App. Configure Android-specific settings by opening the config.xml file in your project's root directory and updating the <widget> tag with your app's information.
- Step 6: Build and Run Your App. Connect your device or an emulator and run your app. Once you are done, you’ll see your app running on your device or emulator.
How to Build an App With Python?
To build an app with Python, follow these important steps:
- Step 1: Choose Your Framework. Choose Kivy which is ideal for apps requiring custom UIs and graphics and multi-touch or BeeWare: Best for apps that need a native look and feel on each platform.
- Step 2: Set Up The Environment. Install Python 3.5 on your machine and run command prompt:pip. Install KivyMD for Material Design components.
- Step 3: Initialize Your Project. Start a new project by creating a Python file and import Kivy components to begin developing your app’s UI and logic.
- Step 4: Design Your App’s UI. Use .kv language to create dynamic and flexible UIs and define your interface.
- Step 5: Implement Your App Logic. Incorporate your app’s functionality: This includes handling user interactions, processing data, and defining the overall behavior of the app.
- Step 6: Test Your App. Test your app using tools such as Pyjnius for Android or Pyobjus for iOS if you need access to platform-specific APIs.
- Step 7: Package and Deploy. Package and deploy your app for platforms such as PyInstaller (for desktop) or buildozer (for mobile).
The key considerations to build an app with Python include the app type, performance and efficiency, scalability, user interface(UI), security, code structure and maintainability.
How to Build an App With Java?
To build an app with Java, follow these steps:
- Step 1: Create Your First Android Project. Install Java Development Kit (JDK) and an IDE like IntelliJ IDEA or NetBeans from the Oracle JDK download page.
- Step 3: Create a New Java Project. Open IntelliJ IDEA, and create a new Java project. Choose JavaFX as the project type. Download the JavaFX SDK from their official website.
- Step 4: Create the App. Start building your Java app. To build the app for Android, use Java as the primary programming language and Android Studio as the official IDE for Android development.
- Step 6: Run the App. Set up an emulator in Android Studio through the AVD or connect your Android phone via USB to run the app on the actual device. Finally, launch the app.
Consider the usability and accessibility of your app by making it responsive, intuitive, and easy to navigate.
How to Build an App with React Native?
To build an app with React Native follow these steps:
- Step 1: Install Node.js. Download and install the Node.js from the official website.
- Step 2: Install iOS Dependencies. Download and install Xcode from the mac App Store and Cocoapods and simulators to configure actual iOS devices to run the project.
- Step 3: Install Android Dependencies. Download the OpenJDK's Azul Zulu with Homebrew from Android official website and install it.
- Step 4: Create a New React Native Project. Create a new React Native project by running a command npx react-native init MyFirstApp.
- Step 5: Build Your First Screen. Build Your First Screen in React Native by opening App.js in your code editor and replacing the default code.
- Step 6: Run the App on iOS or Android. Enter the iOS command in the VS Code's Terminal to run your app on iOS or Android.
When building an app with React Native, you need to consider the app performance, navigation, cross-platform consistency, device capability and app security.
How to Build an App with Flutter?
To build an app with Flutter, you need to follow the following steps:
- Step 1: Install Flutter. Unzip the Flutter software development kit and add it to PATH.
- Step 2: Set up an Editor. Use an IDE that supports Flutter, such as Visual Studio Code, or Android Studio and install the Flutter and Dart plugins to enable language support.
- Step 3: Create a Project. Create a new Flutter project using the command palette and build the app.
- Step 4: Publish the App. Go to the Android app in the Google Play Store and sign up. Finally, Upload your app bundle or APK file.
When building an app with Flutter consider aspects such as the architecture, design, programming language, cost and multiplatform.
How to Build an App with Node.js?
To build an app with Node js you need to follow these steps:
- Step 1: Set Up Your Environment. Download Node.js from https://nodejs.org.and install it on your system. Choose a code editor from popular choices like Visual Studio Code, Sublime Text and Atom.
- Step 2: Initialize a Node.js Project. Create a new project directory and initialize a Node.js project.
- Step 3: Install Required Dependencies. Install Express.js, which is a minimalist web framework for Node.js. Install tools like Nodemon to help you with auto-reloading during development.
- Step 4: Create the Basic App Structure. Create a basic structure for your app that contains your HTML files to display a simple web page.
- Step 5: Add Database. Integrate a database like MongoDB or MySQL.
- Step 6: Deploy Your App. Deploy your app using platforms such as Heroku, Vercel and DigitalOcean for easy serverless deployments and more control over your environment.
The key considerations when building your app with node include real-time communication, multi-user collaboration, live data streaming, ease of use and real-time analytics.
How to Build an App with Kotlin?
To build an app with Kotlin, follow the five steps listed below.
- Install Kotlin Development Kit. Download Android Studio, install the Kotlin plugin, configure the build environment, and verify compiler settings.
- Create Kotlin Project Structure. Open Android Studio, start a new project, select Kotlin as the language, define a package name, and set the minimum API level.
- Design UI Layouts with XML. Edit activity_main.xml file, add UI components in Design tab, arrange buttons and text fields, and apply styling.
- Write Kotlin Logic and Functions. Develop the MainActivity.kt class, implement event listeners, write business logic, and integrate backend APIs using Kotlin app development.
- Test and Deploy Application. Run emulator, test functionality, debug errors, build signed APK, and publish to Google Play Store.
How to Build an App with Kivy?
To build an app with Kivy follow these steps:
- Step 1: Set Up Your Development Environment. Download and install the latest version of Python from the official website. Install Kivy using pip (Python's package installer).
- Step 2: Create a Basic Kivy Application. Create a Python file and start and import the necessary Kivy modules. Kivy provides layout classes such as BoxLayout, GridLayout, and StackLayout to help you manage the arrangements of widgets.
- Step 3: Add Functionality. Add interactivity to the app by defining event handlers and separating the layout from the Python logic for better maintainability.
- Step 4: Package Your App. Use tools like Xcode (for iOS) or Buildozer (for Android) to package your Kivy application.
- Step 5: Deploy Your App. Use tools such as PyInstaller or cx_Freeze to package the app for Windows, macOS, or Linux.
Consider things such as platform compatibility, user interface design, handling device features and app performance when building an app with Kivy.
How to Build an App with Bubble?
To build an app with bubble, follow these steps:
- Step 1: Create a Bubble Account. Create a free Bubble account and start the project.
- Step 2: Plan Your App. Define what problem your app will solve and think about the data you’ll need.
- Step 3: Start the Project. Click on the "New App" from the dashboard and start building the app.
- Step 4: Design Your UI. Create the visual interface for your app by adding elements such as the test, images and icons.
- Step 5: Set Up Your Database. Go to the Data Tab to define the data types for your app and configure the privacy rules to control who can view and modify data.
- Step 6: Preview and Test Your App. Use the Preview button to test your app in a browser. Use a debugger tool to track the flow of data and see what’s happening in the background.
- Step 7: Deploy Your App. Connect a custom domain and click the Deploy button to make your app live.
Key considerations when building an app with Bubble include security, database maintenance, compatibility, design and the paid plans.
How to Build an App with Angular?
To build an app with Angular follow these steps:
- Step 1: Set Up Your Development Environment. Download and install Python. Next, install Kivy using pip (Python's package installer).
- Step 2: Create a New Project. Create a new project and navigate into your project folder to run the development server.
- Step 3: Build the App. Generate new components using Angular CLI and build the app.
- Step 4: Deploy to a Web Server. Deploy the app to any web server or hosting service, such as Firebase Hosting, Netlify or Amazon S3/CloudFront.
To build your app with Angular you need to consider flexibility, two-way binding, simple architecture and compatibility etc.
How to Build an App with Power Apps?
To build an app in PowerApps follow these steps:
- Step 1: Set Up the Environment. Sign in to Power Apps with your Microsoft account and familiarize yourself with types of power apps such as the Canvas Apps, Model-Driven Apps and Portal Apps.
- Step 2: Plan Your App. Clearly define the purpose of the app and sketch out how it should function.
- Step 3: Create a New Canvas App. Create a new Canvas App and choose the data source.
- Step 4: Design the User Interface (UI). Design the UI using the Canvas App editor. Add controls, layout, themes and colors Also add icons and buttons to navigate.
- Step 5: Test and Publish the App. Test to confirm whether the app has issues and then publish it.
Key considerations include service experience, performance, device compatibility, security and testing.
How to Build an App in Xcode?
To build an app in Xcode, follow the seven steps listed below.
- Download and Configure Xcode. Install Xcode from the Apple Developer portal, set up iOS simulators, verify system requirements, and configure development settings.
- Plan Application Architecture. Define app features, create wireframes, map user flows, and document technical specifications for structured development.
- Create a new Xcode Project. Open Xcode workspace, select "Create New Project," enter app name, choose Swift language, and target iPhone device.
- Build Views with SwiftUI. Design user interfaces using the SwiftUI framework, add buttons and text fields, implement navigation, and configure layouts.
- Connect Backend Services. Write Swift code to integrate APIs, handle network requests, process JSON responses, and manage data persistence.
- Implement Testing and Debugging. Run iOS simulator, test all features, identify bugs, use Xcode debugger tools, and resolve issues systematically.
- Submit to App Store. Archive app bundle, prepare screenshots and description, submit through App Store Connect, and await Apple approval following Xcode app development guidelines.
How to Build an App in Swift?
To build an app in Swift, follow these steps:
- Step 1: Install Xcode. Download and install the Xcode from the Mac App Store. Next, create a new project by opening and clicking click on Create a new Xcode project.
- Step 2: Configure Your Project. Enter the name, language and organization identifier of the app and choose a Swift framework.
- Step 3: Design the User Interface. Design the UI using SwiftUI which is declarative and modern. Open the ContentView.swift file and modify the code.
- Step 4: Create the App Logic. Add the app logic to handle events, such as user interactions or data updates. Use tools such as Console, Breakpoints and Debug Navigator to troubleshoot any issues and check performance metrics.
- Step 5: Build and Deploy the App. Build a production version and submit it to the App Store.
When building an app in Swift, it's important to consider factors such as the architecture, programming language, coding style, iOSverson support, and the overall cost.
How to Build an App in Figma?
To build an app in Figma follow these steps:
- Step 1: Wireframe Your App. Create a minimalist version of our app idea by getting ideas from design websites like Uplabs, Mobbin, or Ui8.
- Step 2: Download Plugins. Download and integrate plugins such as Unsplash, Lorem Ipsum and Iconify. Use these plugins to fill in our app wireframe.
- Step 3: Add Content to Your Wireframe. Create a high-fidelity visual representation of your wireframe and replace the boxes with actual content.
- Step 4: Get Feedback on Your Design. Collaborate with other designers, and users to get feedback.
- Step 5: Share Your Design with the Figma Community. Publish your designs and plugins to share with the community.
Consider factors such as design goals, spacing, user flows, plugins, visual hierarchy, and collaborations when building an app with Figma.
How to Build an eCommerce App?
To build an eCommerce app, follow the five steps listed below.
- Design Product Catalogue Database. Structure the catalogue by organising product data, categorising inventory by type and price, and establishing merchant systems.
- Build Shopping Cart Functionality. Enable users to select items by implementing add-to-cart features, adjusting quantities, and creating checkout processes.
- Implement Payment Gateway Integration. Secure transactions by integrating payment gateways, accepting multiple card types, and applying encryption protocols.
- Create User Authentication Systems. Protect user accounts by developing registration and login functionality, enabling password recovery, and personalising customer profiles.
- Deploy and Optimise Performance. Launch the app on iOS and Google Play Store, improve infrastructure using ecommerce app development best practices, monitor metrics, and strengthen security protocols.
How to Build a Gaming App?
To build a gaming app, follow the six steps listed below.
- Define Game Concept. Plan the game by outlining rules, setting win conditions, and deciding what type of game to create.
- Create Game Assets. Design characters and scenes by drawing sprites, making animations, and recording sound effects for the game world.
- Develop Game Logic. Code player movement by adding "jump", "run", and "attack" commands, then "apply" collision detection to stop players from passing through walls.
- Build User Interface. Design menus by adding "Start Game", "Settings", and "Exit" buttons, and display score and health on the screen in play.
- Test and Debug the Game Application. Run the game on the emulator by clicking "Play", testing each level, fixing crashes, and balancing difficulty to ensure smooth gameplay.
- Deploy the Gaming App to App Stores. Launch the game on iOS and Google Play Store, optimise performance using gaming app development, and monitor user feedback for future updates.
How to Build a Social Media App?
To build a social media app, follow the five steps listed below.
- Research and identify the Target Audience. Analyse social media apps to understand user needs and establish a proposition for the app.
- Define App Features and Functionality. Outline features by adding capabilities that differentiate the app from competitors and increase user engagement through social media app development strategies.
- Create Prototypes and Design UI/UX. Build prototypes to refine user experience and gather feedback, then design an intuitive interface that users navigate easily.
- Develop Backend Infrastructure and APIs. Construct databases, APIs, and cloud storage to manage user data, deliver content, and support apps on all platforms.
- Test the Social Media App. Test the app completely, deploy to iOS and Google Play Store, and optimise for app store standards and performance metrics.
How to Build a Utility App?
To build a utility app follow these steps:
- Step 1: Planning.Market research and truly understand what the users are looking for. By identifying their needs, you can create an app that addresses their pain points and stands out from the competition.
- Step 2: Design and Development. Design an intuitive and user-friendly with the most important features that provide a smooth user experience. Use tools such as Adobe XD, Sketch, or Figma to navigate your design requirements. Employing technologies like HTML5, and CSS3 and responsive frameworks.
- Step 3: Testing the App. Test the app to ensure it’s a bug-free and reliable utility app.
- Step 4: Deploy the App. Deploy the app by submitting it to platforms like the App Store and Google Play Store.
Some of the main things to consider when building a utility app include user interface, target audience, app icon, budget, security and privacy.
How to Build a Dating App?
To build a dating app follow these steps:
- Step 1: Know Your Target Audience. Understand your target audience and create an app depending on the type of dating solution they need. Also, analyze your competition.
- Step 2: Choose the Right Development Team. Choose a reliable software partner with the qualifications and experience you need for your dating app development.
- Step 3: Select Features. Choose features and functionalities. Come up with something unique while keeping in mind your goals and budget.
- Step 4: Define the Tech Stack. Decide which programming languages, databases, cloud storage or web servers to use.
- Step 5: Create an Intuitive UI/UX. Create an app with smooth navigation, and ensure seamless transitions between the app’s elements.
- Step 6: Test and Launch. Test the app for any errors or bugs and launch it.
Consider aspects such as user experience, matching system, security, and monetization strategy when creating a dating app.
How to Build a Messaging App?
To build a messaging app follow these steps:
- Step 1: Know Your Goals and Choose a Platform. Know your goals and decide whether to work with platforms such as iOS, Android, or web-based platforms.
- Step 2: Create a User Interface. Build a user interface while considering aspects such as the visual design, colors, fonts, and layout to ensure ease of navigation.
- Step 3: Build Your App’s Backend. Use a programming language such as Python and Django to create a database schema.
- Step 4: Include Third-Party APIs. Integrate third-party APIs such as Google Maps or Stripe for location sharing and payments. Identify which APIs will add value to your app and integrate them into your code.
- Step 5: Test and Launch the App. Thoroughly test the app's performance, security, and functionality to ensure that it functions well. Finally, launch the app and monitor performance while getting feedback.
The main factors to consider when building a gaming app are encryption, geolocation, backend infrastructure, and development costs.
How to Build a Real Estate App?
To build a real estate app, follow the five steps listed below.
- Conduct Market Research. Study the target audience by examining competitors and user needs in the real estate market.
- Prepare Monetisation Strategy. Choose revenue options (listing fees) and select features that support business goals for the app.
- Create UI/UX Design. Design a custom interface that accommodates customer needs, provides intuitive navigation for property browsing, and integrates a real estate app development interface.
- Develop and Test MVP. Build a stripped version of the app, test functionality thoroughly, and fix bugs before full deployment.
- Optimise the Real Estate App. Release the app to iOS and Google Play Store, validate user feedback, and make improvements based on market performance.
How to Build an Entertainment App?
To build an entertainment app, you need to follow these steps:
- Step 1: Define Your App Concept. Determine what kind of entertainment app you intend to build. Entertainment app you want to build and know your target audience.
- Step 2: Choose a Platform. Decide whether you want to build your app for iOS, Android, macOS or cross platforms.
- Step 3: Design the User Interface (UI). Design the user interface by considering the user experience intuitive navigation, vibrant visuals, and personalization among others.
- Step 4: Include the Core Features. Implement the core functionality by including features such as media player, content management, streaming and offline support.
- Step 5: Implement Monetization. Consider strategies like a subscription-based model, freemium model or in-app purchases.
- Step 6: Test and Launch the App. Test the app to ensure that everything is working well. Finally, deploy the app to the app store, Google Play Store or hosting services such as Vercel and Netflix.
Consider aspects like easy content updates, push notifications, app categories, social media integrations and user experience.
How to Build a Sports App?
To build a sports app follow these step by step guide:
- Step 1: Plan. Determine the target user base, the technology stack to build the app, features and functionalities to add to the sports app, user interfaces for the app, and more.
- Step 2: Set Up the Development Team. Hire a dedicated mobile app developer to help you build the sports app.
- Step 3: Design the UI/UX. Design an intuitive and user-friendly user interface to offer an enhanced user experience (UX).
- Step 4: Develop the Sports App. Build the backend infrastructure using app development frameworks, programming languages, and, application programming interfaces (APIs), and more.
- Step 5: Test and Launch the App. Test the sports app to identify bugs and glitches and fix them. Next, launch the sports app on the Google Play Store and App Store.
Some of the factors to consider when building sports apps are scalability, social media integration, live streaming, artificial intelligence, and notifications.
How to Build a Chatbot App?
To build a chatbot app follow this guide:
- Step 1: Know Your Goals: Define your business goals and know your target audience.
- Step 2: Choose the Tech Stack: Choose your Tech Stack that allows you to integrate AI in mobile app development. Consider programming languages such as Python, Java, JavaScript, and PHP.
- Step 3: Select the Features: Have a list of features such as automation, personalized content, multi-language support and fast response among others.
- Step 4: Find a Dedicated Team: Look for a team that specializes in machine learning, artificial intelligence, NLP, and other tech stacks for developing a fully functional chatbot application like ChatGPT.
- Step 5: Develop and Deploy: Develop the chatbot mobile app using the required tech stacks and deploy it after validating it.
Key considerations when developing a chatbot include a channel for communication, the impact of the invisible interface, notifications and language processing requirements.
How to Build a Taxi Booking App?
To build a taxi booking app, follow the six steps listed below.
- Hire a Development Team. Select a development partner with broad expertise and a strong portfolio of transportation app projects.
- Define Niche and Target Audience. Identify goals and audience by conducting a market analysis of the taxi service sector.
- Develop an MVP for the App. Build a minimum viable product to demonstrate core functionality (ride booking, driver tracking, and basic payment processing) using taxi app development.
- Pick a Tech Stack. Identify databases, payment solutions, and backend services that support real-time GPS tracking and rider-driver communication.
- Decide on Monetisation Model. Analyse revenue options (commission fees, subscription plans, or surge pricing) that work for the business model.
- Design UI/UX and Deploy. Create an intuitive interface offering navigation, test the app thoroughly, and deploy to iOS and the Google Play Store.
How to Build a Food Delivery App?
To build a food delivery app, follow these steps:
- Step 1: Analyze Your App Idea: Do focused market research to validate your app and ensure it meets specific needs.
- Step 2: Choose a Development Partner: Choose the most suitable development method like hiring an app development team or collaborating with a technology partner.
- Step 3: Define Your Strategy: Define a business model that aligns with your food delivery app. Consider subscription-based, commission-based, or hybrid models to monetize your app.
- Step 4: Choose Essential Features: Include features such as a user-friendly interface, easy navigation and real-time tracking among others.
- Step 5: Design and Build the App: Proceed to design and develop your app by creating wireframes and prototypes to visualize the app’s structure and functionality.
- Step 6: Test and Launch the App: Test the app and launch it by deploying it on platforms such as Apple Play or Google Play Store.
When building a food delivery app, consider things like payment options, geolocation, user interface, and menu management order history among others.
How to Build a Finance App?
To build a finance app, follow the six steps listed below.
- Define Target Market. Identify goals by understanding market needs and establishing features for financial management.
- Analyse Competitor Strategy. Research competitors to determine what they do well, identify gaps in the market, and define the problem the app solves.
- Plan the App Features. Create a feature list including account authorisation, user profiles, income tracking, expense management, and notifications for users.
- Select Technology Stack. Decide on tools, libraries, databases, and programming languages required to build finance app development solutions securely.
- Design User Interface and Experience. Build a simple interface by incorporating an intuitive user flow and seamless screen transitions for financial transactions.
- Test and Launch the Finance App. Conduct security testing, data integrity checks, and functional testing to ensure the app works reliably, and deploy to iOS and Google Play Store.
How to Build a Travel App?
To build a travel app follow this step by step guide:
- Step 1: Choose the App Type: Decide whether you want to develop a booking, accommodation booking app, transport app, or travel guides app.
- Step 2: Conduct Research: Conduct market research to help you understand your target market and competition. Discover other businesses in your niche, their advantages, and disadvantages.
- Step 3: Select the Features: Include features such as user account, social sharing, booking, in-app payment, and location-based search & filters.
- Step 4: Hire Travel App Developers: Hire the best travel app developer UK with experience and expertise.
- Step 5: Develop the App: Develop the travel app, test and launch it by submitting it to the Google Play Store, Apple App Store or other relevant platforms.
You need to consider factors such as user experience, monetization features, app integration, and customer support when building a travel app.
How to Build a GDPR-Compliant App?
To build a GDPR-compliant app—one that protects user data and meets EU privacy standards—follow these steps:
- Step 1: Gain User Consent: Clearly ask for user permission before collecting any data.
- Step 2: Limit Data Collection: Collect only the essential data needed for the app's functionality.
- Step 3: Be Transparent: Provide a clear privacy policy explaining data collection, use, and storage practices.
- Step 4: Enable Data Access and Deletion: Allow users to view, download, and request the deletion of their data.
- Step 5: Ensure Data Security: Use encryption and secure storage to protect user data.
- Step 6: Document Compliance: Maintain detailed records of all compliance measures and practices.
- Step 7: Secure Third-Party Agreements: Ensure that third-party data processors also adhere to GDPR standards.
These steps help your app respect user privacy, secure data, and comply with GDPR regulations. Key considerations when building a GDPR-compliant app include data security, privacy, legal data collection, and monetization options aligned with GDPR standards.
How to Build a Healthcare App?
- Step 1: Do Market Analysis: Study your niche, and know about your target audience and competitors.
- Step 2: Choose App Type: Know the type of app you intend to create to help you determine its database, functionality, and goal.
- Step 3: Create Design: Create a consistent and intuitive design. Make sure it's user-friendly and easy to understand.
- Step 4: Make it HIPAA-Compliant: Make sure the app complies with regulations such as HIPAA or GDPR.
- Step 5: Build and Deploy the App: Build the app and make sure it's viable before deploying it.
Some of the things to keep in mind include making sure it's compliant, user-friendly, fast-loading, effective customer support and device compatibility.
How to Build an AR/VR (Augmented/Virtual Reality) App
To build an AR/VR app, follow the five steps listed below.
- Define AR/VR Experience and Goals. Identify what users experience through augmented or virtual reality, establishing object recognition or environments.
- Design 3D Assets and Graphics. Create 3D models, textures, and animations that render properly in AR/VR environments using game engines and design tools.
- Choose Development Platform and Tools. Select frameworks (RKit for iOS or ARCore for Android), and decide on AR development engines that support vision.
- Build Tracking and Interaction Features. Implement spatial tracking, gesture recognition, and user interaction systems that respond to real-world movements and touch inputs.
- Deploy AR/VR App. Conduct testing on multiple devices to ensure performance, validate experience quality, and launch to app stores.
How to Build an IoT (Internet of Things) Connected App
To build an IoT app, follow the five steps listed below.
- Select IoT Devices and Sensors. Identify which IoT devices the app connects with (smartwatches, sensors, and home automation systems).
- Design Cloud Backend Architecture. Build a cloud infrastructure that receives and processes data from multiple connected devices in real-time.
- Develop Connectivity Protocols. Implement communication standards (WiFi, Bluetooth, and cellular) to establish connections between the app and IoT devices.
- Create Device Management Interface. Design an intuitive dashboard that enables users to monitor, control, and configure connected devices.
- Monitor Connected App. Deploy the platform to iOS and Google Play Store, validate device connectivity, and maintain ongoing security protocols.
How to Build a Web3 / Blockchain App
To build a Web3 blockchain app, follow the seven steps listed below.
- Understand Blockchain Technology. Research blockchain concepts, consensus mechanisms, and cryptocurrency to grasp distributed ledger systems.
- Define Smart Contract Requirements. Outline functionality that smart contracts execute, including token transfers, transactions, and automated business logic.
- Choose a Blockchain Platform. Select a blockchain network (Ethereum, Solana, or Polygon) based on scalability, transaction costs, and feature compatibility.
- Design App Architecture. Plan the system by mapping frontend interfaces to blockchain backends, establishing wallet integration, and defining data flow using custom app development frameworks.
- Develop Smart Contracts. Write code using Solidity or other languages, implementing token economics and validation on the blockchain.
- Build User Interface. Create a wallet interface that displays balances, transaction history, and enables users to interact with smart contracts.
- Release and Audit Web3 App. Conduct security audits, test on testnets, publish to mainnet, and release the app to iOS and Google Play Store for global adoption.
How to Build an App for Wearables (Smartwatches)
To build a wearable app, follow the six steps listed below.
- Understand Wearable Device Capabilities. Research smartwatch specifications, screen sizes, and battery constraints to determine app viability.
- Design a Lightweight User Interface. Create a minimal interface optimised for small screens with simplified navigation and touch controls.
- Choose Wearable Development Framework. Select WatchOS for Apple Watch or Wear OS for Android smartwatches to build compatible apps.
- Develop Core App Functionality. Build features (health tracking, notifications, and fitness monitoring) that work on wearable hardware.
- Optimise Battery and Performance. Reduce power consumption by minimising background processes and limiting data syncing on devices.
- Launch Wearable App. Validate performance on actual smartwatches, test battery drain, and deploy to Apple Watch App Store and Google Play Store.
Should I Create an App on My Own or Hire an App Developer?
You should create an app on your own if you have the skills needed or hire an app developer if you have a complex job that requires expertise and experience. Hiring an app developer helps you access modern technology you need to manage your project most efficiently. When hiring an app developer, consider their experience and expertise. Look for developers with experience in your industry, relevant technical certifications and knowledge of operating systems.
How much does it cost to build an app?
App development costs range from £10,000 to £40,000, depending on factors like the operating system, app complexity, hosting and server infrastructure, and third-party integrations. Advanced technologies such as Big Data Analytics can further influence the overall cost.
How long does it take to build an app?
Building a basic app with limited functionality takes 2–4 months, while an advanced app may take 9 months or more. The app development timeline depends on app features, team expertise, and the development approach.
How to get funding for an app?
To get funding for an app, consider private investors, bootstrapping, or crowdfunding. App funding through crowdfunding involves raising money using specific platforms like Kickstarter or Indiegogo. Bootstrapping involves building the app at the owner's expense, without sharing equity or borrowing huge sums of money from banks.
How to make money from building an app?
To make money from building an app, use methods like affiliate marketing, subscriptions, the freemium model, pay-to-download, and selling goods or services. Affiliate marketing generates income by promoting other apps, products, or services within your app, while in-app purchases allow users to buy extra features, content, or virtual goods.
How to build an app for free?
To build an app for free, use no-code tools like Appy Pie and AppSheet. Appy Pie lets you create apps without coding, while AppSheet uses AI to automatically generate code, making app development accessible to non-programmers.
How to maintain an app?
To maintain an app, you need to carry regular updates, integrate user feedback, monitor performance, and take proactive security measures. Maintaining your app helps keep the app performing well and provides the best user experience.
How to Choose and Hire a Reliable App Development Agency?
To choose and hire a reliable app development agency, there are four steps to follow. First, verify the portfolio by examining projects in the industry that show results. Second, evaluate the technical capabilities by assessing the development methodology, technology stack, and coding standards they follow. Third, validate client testimonials by requesting references and speaking with previous clients. Lastly, assess reliability by checking if they provide post-launch maintenance and proven expertise in mobile app development practices that align with business goals like Intelivita.
Hire a Reliable A Developer!
How to Manage a Remote or Offshore App Development Team?
To manage a remote or offshore app development team, there are five steps to follow. First, establish protocols by setting up collaboration tools (Jira, Slack, and GitHub) to maintain transparency in different time zones. Second, document coding standards and implement code review processes to ensure quality consistency regardless of team location.
Third, schedule standups in overlapping working hours to align team members and address blockers immediately. Fourth, assign project managers as liaisons between the company and the offshore team to resolve issues quickly. Lastly, implement deliverables with fixed deadlines to keep offshore teams accountable and reduce deployment bottlenecks, with objectives.
How to Create App Wireframes and User Flows?
To create app wireframes and user flows, follow the five steps listed below.
- Define Journey and Goals. Map the user's path through the app by identifying entry points, interactions, and desired outcomes at each stage.
- Sketch Layout and Navigation. Sketch wireframes by drawing screens, buttons, and content placement to establish visual hierarchy and flow between pages.
- Outline User Interactions. Document how users navigate between screens, what actions they perform, and which elements trigger transitions or data submissions.
- Create Information Architecture. Organise app structure by categorising features, defining menu hierarchies, and establishing logical relationships between screens and functions.
- Validate and Test Flows. Review wireframes with stakeholders, gather feedback, identify gaps in navigation, and refine user flows based on usability insights.
How to Design for Accessibility (WCAG Compliance)?
To design for accessibility (WCAG Compliance), there are five steps to follow. First, understand WCAG guidelines by researching the three levels-A, AA, and AAA-and identifying standards for the app type. Second, implement colour contrast by ensuring text readability against backgrounds.
Third, enable keyboard navigation by making elements accessible without a mouse. Fourth, add descriptive alt text to images, use semantic HTML structure, and provide captions for video content. Lastly, test accessibility compliance using Axe DevTools or WAVE and perform regular audits.
How to Conduct UX Testing with Real Users Before Coding?
To conduct UX testing with real users before coding, there are six steps to follow. First, establish testing objectives which features and points require validation. Second, recruit representative users matching the target audien
Never Miss an Update From Us!
Sign up now and get notified when we publish a new article!


 India
India
514, Silver Radiance 2, Science City Rd, Nr. Shakti Arcade, Sola, Ahmedabad, Gujarat