To build an Android app with Kotlin, the process involves setting up the development environment, choosing the right framework, designing the UI, writing app logic, testing the app, debugging and optimizing, building the APK/AAB, and finally publishing to the Google Play Store. Kotlin, the official language for Android development, provides developers with powerful tools and frameworks to create high-performance apps that run natively on Android devices.
The steps for building an Android app with Kotlin are as follows:
- Set Up Your Development Environment: Install Android Studio, the Android SDK, and ensure the latest version of Kotlin is integrated. Configure tools such as Gradle for project management and set up an emulator for testing.
- Create a New Kotlin Android Project: Use Android Studio to create a new project, selecting the appropriate template and configuring project settings.
- Understand the Project Structure: Familiarize yourself with how Android Studio organizes the app's components, such as source code, resources, and manifest files.
- Build the User Interface: Design the app's interface using Jetpack Compose or XML-based layouts. Make sure it's user-friendly and responsive.
- Handle User Interactions: Implement functionality for buttons, text inputs, and gestures using Kotlin code to respond to user actions.
- Add Business Logic and Architecture: Structure the app's code using architectures like MVVM, and implement business logic to handle user data, network requests, etc.
- Store and Retrieve Data: Use Firebase or Room for managing local and cloud-based data. Ensure the app handles user data securely.
- Add Network Connectivity: Implement network capabilities for fetching and sending data, using libraries like Retrofit or Volley for API calls.
- Test the App: Test the app on multiple devices and Android versions to identify bugs and performance issues.
- Debug and Optimize: Use Android Studio's profiling tools to debug and optimize the app's performance.
- Build and Generate APK/AAB: Generate the APK or AAB files ready for installation or submission to the Google Play Store.
- Publish to Google Play Store: Create a developer account, upload your APK/AAB, and submit the app for review.
When hiring an Android app development company, consider the company's experience with Kotlin, Android Studio, and Jetpack Compose. Look for a company with a proven track record of delivering high-quality apps on time. Ensure they have experience integrating with Google Play Store, Firebase, and other relevant technologies. Also, consider their portfolio, client reviews, and ability to meet your business needs efficiently.
According to the National Institute on Software Engineering (NISE) titled "Evaluating App Development Companies," 2021, companies with experience in Kotlin development have a 30% faster turnaround time for Android app projects and a 20% lower bug rate.
Step 1: Set Up Your Development Environment
Setting up your development environment is the first and most important step in building Android apps with Kotlin. This step involves installing the necessary software, such as Android Studio, and configuring your system for app development. The purpose is to create an environment where you efficiently write, test, and run Kotlin-based Android apps without encountering issues during development.
A properly set-up environment ensures that all tools work together seamlessly, allowing you to start app development quickly. According to a study by the National Institute of Standards and Technology (NIST) titled "Building a Secure Software Development Environment," 2021, using the latest IDE and SDK tools reduces development errors by 30%.
Android Studio is the official Integrated Development Environment (IDE) for Android development. It supports Kotlin and other programming languages and provides all the features needed to write Android apps. Additionally, the Kotlin plugin, which integrates Kotlin with Android Studio, ensures smooth code writing and error detection.
The Android SDK, which includes various tools and libraries, is also vital for building Android apps. Another required component is the Java Development Kit (JDK), even though Kotlin is the primary language, as it is still necessary for running Android Studio.
One common mistake is failing to install the latest version of Android Studio. Using an outdated version leads to compatibility issues with Kotlin and other tools. Another mistake is not updating the Android SDK and JDK, which build errors or unexpected problems.
It's also important to ensure that your system meets the minimum requirements for Android Studio, as insufficient RAM or storage cause performance issues. Additionally, improper SDK path configuration leads to build failures, so it's important to double-check the configuration to avoid this problem.
Step 2: Create A New Kotlin Android Project
Creating a new Kotlin Android project involves starting a new app within Android Studio. You select the type of project, configure settings, and generate necessary files. The goal is to lay the foundation of your app, defining its structure before you begin adding features.
According to the National Institute on Software Engineering (NISE) titled "Best Practices for Software Project Structuring," 2020, a well-organised project structure reduces development time by 40% and minimises the risk of bugs.
This step sets up the basic framework for the app, including creating activities, fragments, and other components. It ensures a solid structure as you begin coding and add features later on.
The main tools include Android Studio, which helps you choose project templates and configure the app. Kotlin is used for programming, and Gradle manages dependencies. For the UI, XML files define the layout, and Android Studio provides various templates for different app types.
Common mistakes include selecting the wrong project template. This creates unnecessary complexity later. Another mistake is failing to organise the project structure clearly, which complicates adding new features. Also, incorrect project settings, like SDK configurations, cause compatibility issues. Always review and set the correct options for your app's requirements.
Step 3: Understand The Project Structure
Understanding the project structure is a key step in Android app development. This step involves familiarising yourself with how Android Studio organises your project files. It's important to understand where the code, resources, and configuration files are located.
This step's main purpose is to organize your project's navigation. Understanding the structure ensures you know where to place your code, resources, and configurations. It also allows you to make changes efficiently as you progress through development.
The key tools and libraries involved include Android Studio, which automatically sets up your project structure. Key directories include src/main/java for the code, res/ for resources like images and layouts, and AndroidManifest.xml for app configuration. The Gradle build system handles project dependencies and builds.
Common mistakes include not understanding the directory structure, which leads to confusion as the project grows. It's vital to avoid placing files in the wrong directories, as this causes errors. Another mistake is neglecting the importance of AndroidManifest.xml. This file contains vital configurations like permissions and activities. Always check this file before adding features or launching the app.
Step 4: Build The User Interface
Building the user interface (UI) involves designing how users will interact with your app. This step includes creating the layout and adding buttons, text fields, and other UI elements. The goal is to ensure that your app is user-friendly, functional, and visually appealing.
This step's main purpose is to provide a seamless user experience. A well-designed UI ensures users navigate the app easily and efficiently. The layout should be intuitive, ensuring users find what they need with minimal effort.
The tools and frameworks involved include XML for defining the app's layout. ConstraintLayout is commonly used for responsive UI designs. You'll also use Android Studio's Layout Editor for drag-and-drop functionality, simplifying the process. Additionally, Jetpack Compose is a modern toolkit for building UIs in Kotlin, providing more flexibility and less XML coding.
Common mistakes include overcrowding the screen with too many elements, which overwhelms users. Avoid using too many complex layouts, which slow down the app's performance. Another mistake is not considering different screen sizes and resolutions, which causes the UI to look distorted on some devices. To avoid these, ensure that the layout is simple and adaptable to various devices and screen sizes.
Step 5: Handle User Interactions
Handling user interactions involves enabling the app to respond to user actions, such as taps, swipes, or typing. This step covers implementing functionality like button clicks, text input, or navigation events. The goal is to ensure the app reacts appropriately to user input, providing feedback and allowing users to complete tasks.
This step's main purpose is to make the app interactive and dynamic. By handling interactions, you allow users to control the app, navigate between screens, and trigger specific actions. This improves the app's overall usability, creating an engaging experience.
The tools and frameworks involved include Kotlin, which writes the logic for handling user events. ViewModels and LiveData from the Android Jetpack library help manage UI-related data in response to user actions. Button, EditText, and other UI components trigger actions and capture input.
Common mistakes include not providing proper feedback after a user interaction, which confuses the user. Another mistake is neglecting to validate user input, such as incorrect data in text fields, which leads to errors or crashes. Additionally, not managing memory or resources effectively while handling multiple interactions slows down the app. Always ensure efficient data handling and clear user feedback.
Step 6: Add Business Logic & Architecture
Adding business logic and architecture involves structuring the app to handle core functionality, such as calculations, data processing, and decision-making. This step focuses on implementing the app's core features, organising the codebase, and ensuring it's scalable and maintainable. The purpose is to create an organised flow for app operations, allowing easy updates and changes.
The main purpose is to ensure that the app's functionality is efficient and logical. Business logic defines how data is processed and used throughout the app, while the architecture defines the app's structure, making it easier to manage. This step ensures the app operates smoothly and delivers the expected results.
The tools and frameworks involved include MVVM (Model-View-ViewModel) architecture, which separates data handling from UI code. The room is used for local database storage, while Retrofit is a popular library for network calls. Coroutines help with asynchronous tasks, ensuring that background processes do not block the main thread.
Common mistakes include mixing business logic with UI code, which makes the app harder to maintain. Avoid tightly coupling components, as this reduces flexibility. Another mistake is not following architectural patterns, which leads to poor code organization and potential scalability issues. Use a clear separation of concerns and maintain a modular structure to avoid these issues.
Step 7: Store And Retrieve Data
Storing and retrieving data involves managing how the app stores information and retrieves it when needed. This step focuses on using databases or other storage mechanisms to save data such as user preferences, app settings, or dynamic content. The purpose is to ensure that the app handles persistent data and maintains it across sessions.
This step's main purpose is to enable the app to save and retrieve data reliably. Storing data ensures that the app retains necessary information, while retrieving it allows users to continue where they left off. This step ensures that your app functions seamlessly, even after closing and reopening.
The tools and frameworks involved include Room, an Android library for local database management, and SharedPreferences for storing simple key-value pairs. Firebase is also used for cloud-based data storage and syncing across devices. SQLite is another option for storing data in a structured way.
Common mistakes include not handling data consistency properly, which leads to data loss or corruption. Avoid using inefficient data retrieval methods, as they slow down the app. Another mistake is not considering security measures when storing sensitive data. Ensure that data is encrypted and stored securely to protect user privacy.
Step 8: Add Network Connectivity
Adding network connectivity involves enabling your app to communicate with remote servers to fetch or send data. This step focuses on making API calls, handling responses, and managing network requests. The goal is to provide dynamic content and allow your app to interact with the internet for real-time updates or data storage.
This step's main purpose is to ensure the app fetches and sends data across the network. This is vital for apps that need to interact with cloud services, databases, or other online resources. It allows users to access up-to-date information and interact with remote systems, enhancing app functionality.
The tools and frameworks involved include Retrofit for making API calls, OkHttp for handling network requests, and Volley as another popular networking library. Gson is commonly used for parsing JSON responses, while WorkManager is ideal for managing background network tasks.
Common mistakes include not handling network failures properly, which leads to a poor user experience. Always ensure proper error handling, such as retrying failed requests or displaying meaningful error messages. Another mistake is not optimising network requests, which slows down the app. Avoid sending unnecessary data or making redundant calls, as this increases load times and affects performance.
Step 9: Test The App
Testing the app involves running various tests to ensure that the app functions as expected and is free of errors. This step includes testing individual components, user flows, and performance under different conditions. The goal is to identify and fix any issues before the app is launched.
The main purpose of testing is to ensure the app is stable, functional, and user-friendly. Proper testing helps detect bugs, crashes, or performance issues early, allowing for quick resolution. It ensures that the app works correctly on different devices and operating systems.
The tools and frameworks involved include JUnit for unit testing, Espresso for UI testing, and Mockito for mocking objects. Firebase Test Lab is also used for cloud-based testing on real devices. Additionally, Android Studio's Profiler helps measure app performance, such as memory usage and CPU load.
Common mistakes include not testing the app on multiple devices or screen sizes, which leads to layout issues. Always test the app on a range of devices to ensure it looks and functions well. Another mistake is focusing only on happy paths, missing edge cases, and error handling. Be sure to test under unusual or extreme conditions to ensure stability.
Step 10: Debug And Optimize
Debugging and optimization involve identifying and fixing errors in the app, while also improving its performance. This step includes locating issues, such as crashes or slowdowns, and making the necessary adjustments to improve efficiency. The goal is to ensure the app runs smoothly and performs well, even under heavy use.
This step's main purpose is to enhance the app's stability and speed. By fixing bugs and improving performance, you ensure a better user experience. Debugging and optimizing help avoid app crashes, unresponsive features, or long load times that could frustrate users.
The tools and frameworks involved include Android Studio's Debugger, which helps identify issues in the code. Logcat is useful for tracking app logs, while Android Studio Profiler assists in identifying performance bottlenecks, such as excessive memory usage. ProGuard is used for code obfuscation and optimization to improve security and reduce APK size.
Common mistakes include neglecting to test the app's performance after bug fixes. Always ensure that optimization does not introduce new issues, especially with memory management. Another mistake is not using proper error handling, which results in app crashes. Implement comprehensive logging and exception handling to avoid such issues.
Step 11: Build And Generate APK/AAB
Building and generating the APK (Android Package) or AAB (Android App Bundle) involves compiling the app and preparing it for distribution. This step includes selecting the build configuration, generating the final file, and ensuring it's ready for installation or submission to the Google Play Store. The goal is to package the app in a format that is installed on devices or uploaded for distribution.
This step's main purpose is to create a deployable version of your app. Generating the APK or AAB ensures that your app is in the right format for testing, distribution, or deployment. This step is also important for efficiently managing app versions and updates.
The tools involved include Android Studio, which provides built-in support for building both APKs and AABs. The Gradle build system is used to manage dependencies and compile the app. ProGuard is often used to optimise the code and reduce the size of the APK/AAB. BundleTool is used to generate AABs, which are now the recommended format for app distribution on the Google Play Store.
Common mistakes include not optimising the app's size before generating the APK/AAB. Large APKs result in slow download times and affect user experience. Another mistake is not testing the generated APK/AAB on various devices, which leads to compatibility issues. Always check that the generated files work properly across different devices and Android versions.
Step 12: Publish To Google Play Store
Publishing to the Google Play Store involves submitting your app for distribution to users on Android devices. This step includes creating a developer account, uploading the APK/AAB, and filling out necessary information like app description, screenshots, and pricing details. The goal is to make your app available for download by users worldwide.
This step's main purpose is to launch your app and make it accessible to a global audience. By publishing the app, you ensure it is downloaded, installed, and used on Android devices. It's important to complete all required fields and follow Play Store guidelines to ensure a smooth approval process.
The tools involved include the Google Play Console, which is used for managing your app on the Play Store. This tool allows you to upload your app, set pricing, monitor downloads, and track performance. To meet Play Store standards, you will also need to provide high-quality app assets, such as icons, screenshots, and feature graphics.
Common mistakes include not optimising the app listing for search on the Play Store. Ensure your app description is clear and contains relevant keywords to help users find it. Another mistake is neglecting to test the app on multiple devices before submitting it.
Always ensure that your app functions correctly across various devices to avoid issues after publication. Lastly, failing to meet Play Store content guidelines leads to your app being rejected. Review and follow the guidelines closely to prevent rejections.
How To Hire An Android App Development Company?
To hire an Android app development company, key factors to consider include the company's experience, technical expertise, and ability to meet your business requirements. Making the right choice ensures the success of your app development project.

To hire an Android app development company, key factors to consider are:
- Experience in Android App Development: A company with expertise in Android app development is vital for success. Experienced companies have a proven track record of delivering quality apps. They are familiar with the Android platform and know how to tackle common challenges. Their past work serves as an indicator of their capability to deliver your app efficiently.
- Technical Expertise in Kotlin and Android SDK: The company should have expertise in Kotlin and Android SDK to ensure modern, efficient development. Kotlin is the preferred language for Android app development, offering numerous advantages such as concise code and safety features. A company skilled in these technologies will help develop robust and scalable apps.
- Proven Portfolio and Client Reviews: Reviewing the company's portfolio and client feedback gives insight into their capabilities. A strong portfolio reflects a wide range of successful projects. Client testimonials help validate the company's ability to meet deadlines, deliver quality, and provide ongoing support.
- Clear Communication and Project Management: Communication and project management are key to a successful partnership. The company should be responsive, providing regular updates and being transparent about progress. Effective communication ensures that both parties are aligned throughout the development process.
- Post-Launch Support and Maintenance: It's important to hire a company that offers post-launch support. This ensures that any issues that arise after the app is released are addressed promptly. Long-term support helps maintain the app's functionality and security over time.
These factors help ensure you select a competent Android app development company that meets your needs. Intelivita is a leading choice for Android app development in the UK. We offer expertise, a solid portfolio, and reliable customer support. We also place strong emphasis on client satisfaction, boasting a 90% client satisfaction rate.
How To Build Android Apps With Python?
To build Android apps with Python, the steps to follow include setting up your development environment, selecting your framework, creating your project, designing the user interface, writing the app logic, testing your app, debugging and optimizing, building and generating the APK/AAB, and publishing to the Google Play Store. These steps will guide you through the process of developing an Android app using Python.
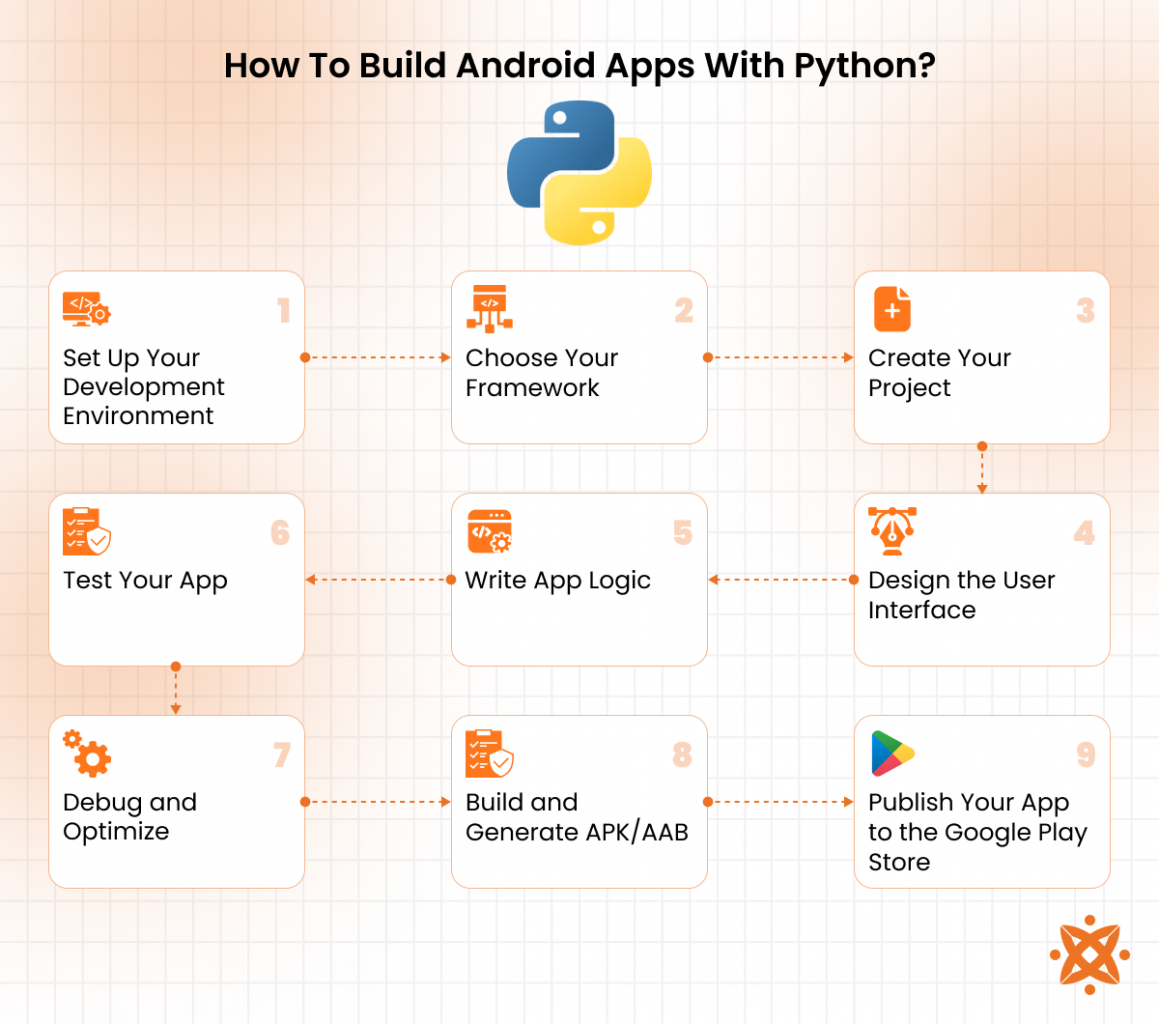
To build Android apps with Python, the steps to follow are:
- Set Up Your Development Environment: Begin by installing Python and pip, the package manager for Python. Then, install Android Studio to get the necessary tools and emulators for Android development. Set up the environment by installing Python libraries like Kivy, BeeWare, or Chaquopy using pip to enable Android app development with Python.
- Choose Your Framework: Choose a framework that best suits your needs. Kivy is great for multitouch applications and supports mobile devices. BeeWare allows you to write native apps for multiple platforms, including Android, using Python. Chaquopy integrates Python with Android Studio for a seamless development experience.
- Create Your Project: Use the selected framework's command-line interface to create a new project. For example, with Kivy, you'll start by creating the basic files and directories for your app. Each framework provides specific commands for setting up a new project structure that you'll work within.
- Design the User Interface: Design the app's UI using the framework's tools. Kivy uses Python scripts to define layouts, while BeeWare offers Toga for building cross-platform UIs. Both frameworks provide predefined widgets and tools to help you create the design quickly.
- Write App Logic: Write the business logic of your app using Python. For instance, in Kivy, you'll use Python to manage app data, events, and interactions. With BeeWare, you'll bind UI components to Python functions to control the app's flow and user interactions.
- Test Your App: Use the Android Emulator or a physical Android device to test the app. Each framework allows you to run the app in an emulator or on a real device to identify bugs or issues. Testing is vital for ensuring that the app functions correctly across different screen sizes and Android versions.
- Debug and Optimize: Debug the app using Android Studio's debugger and logs to identify issues. Optimize the app's performance by refining the Python code to reduce resource usage and improve speed. Be sure to check for any problems with memory or battery consumption, particularly for apps built with frameworks like Kivy.
- Build and Generate APK/AAB: Once the app is tested and optimised, use the framework's tools to build the APK or AAB file. Kivy uses Buildozer to package the app for Android, while Chaquopy integrates with Android Studio to generate APKs or AABs. These files are ready for installation or submission to the Play Store.
- Publish Your App to the Google Play Store: After generating the APK or AAB, create a developer account on the Google Play Store and upload your app. Fill out the necessary details, such as the app's description, screenshots, and pricing. Once submitted, your app will be reviewed before being published to the Play Store.
How To Build Android Apps With JavaScript?
To build Android apps with JavaScript, the steps to follow include setting up your development environment, choosing your framework, creating your project, designing the user interface, writing the app logic, testing your app, debugging and optimizing, building and generating the APK/AAB, and publishing to the Google Play Store. These steps guide you from initial setup to launching your app on Android devices.
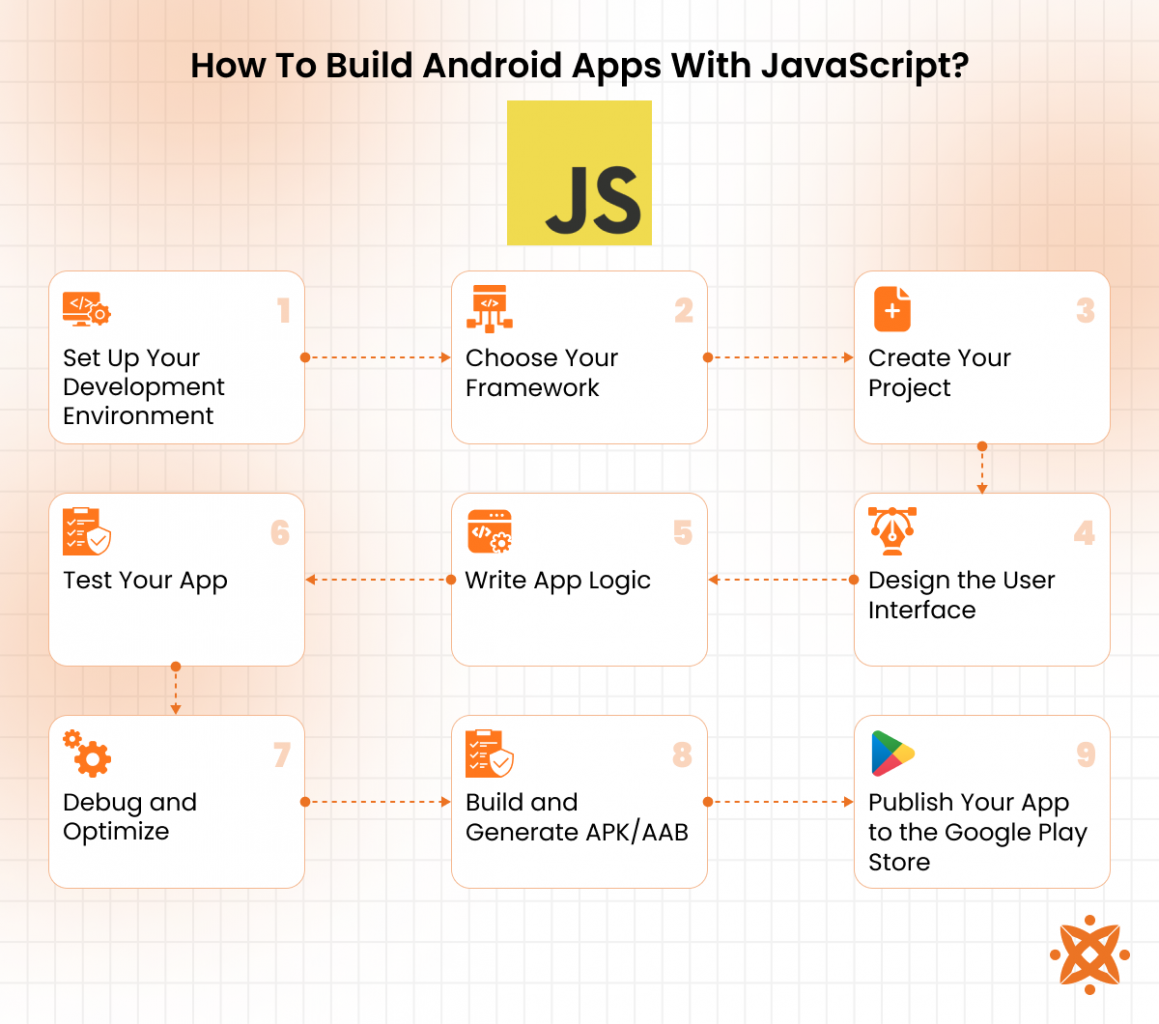
To build Android apps with JavaScript, the steps to follow are:
- Set Up Your Development Environment: Begin by installing Node.js and npm, the JavaScript package managers. You'll also need to install Android Studio for Android-specific development tools and emulators. Once everything is installed, you set up your development environment by installing the necessary frameworks, such as React Native or Ionic, using npm.
- Choose Your Framework: Select a framework based on your project needs. React Native is popular for creating high-performance native apps with a JavaScript codebase. Ionic is great for building hybrid apps using web technologies. NativeScript allows you to access native APIs directly, and PhoneGap or Cordova is suitable for simpler apps built with HTML, CSS, and JavaScript.
- Create Your Project: Use the chosen framework's CLI tools to generate a new project. For instance, in React Native, you would use the command npx react-native init ProjectName to create a new app. Each framework has its commands and templates for quickly setting up a project structure.
- Design the User Interface: Design your app's interface using the UI components provided by the framework. React Native uses JSX to define the layout, while Ionic uses HTML-based components. Both frameworks offer pre-designed components that adapt well to Android screens.
- Write App Logic: Write the business logic of your app using JavaScript. For example, in React Native, you will use state management with hooks or Redux to manage app data. In NativeScript, you will bind UI components to JavaScript functions that manage the app's state and interactions.
- Test Your App: Use the Android Emulator or a physical Android device to test your app. Each framework offers tools to run your app on a real device or in an emulator. Testing is vital to check for performance issues, UI glitches, and overall functionality.
- Debug and Optimize: Debug the app using Chrome DevTools or React Native Debugger for React Native apps. Optimize your code for performance, especially if you are using hybrid frameworks like Ionic or PhoneGap, as they are slower than native apps.
- Build and Generate APK/AAB: Once you have tested and optimised the app, the next step is to build the APK or AAB file. Ionic and React Native provide build commands to generate these files, which are used for installation on devices or submission to the Google Play Store.
- Publish Your App to the Google Play Store: The final step is to submit your app to the Google Play Store. You will need to create a developer account on the Play Store, upload your APK or AAB file, and fill out the app's description and other details. After submission, your app will undergo a review process before being published.
How To Build Android Apps With C#?
To build Android apps with C#, the steps to follow include setting up your development environment, choosing your framework, creating your project, designing the user interface, writing the app logic, testing your app, debugging and optimizing, building and generating the APK/AAB, and publishing to the Google Play Store. These steps will guide you through the process of developing an Android app using C#.
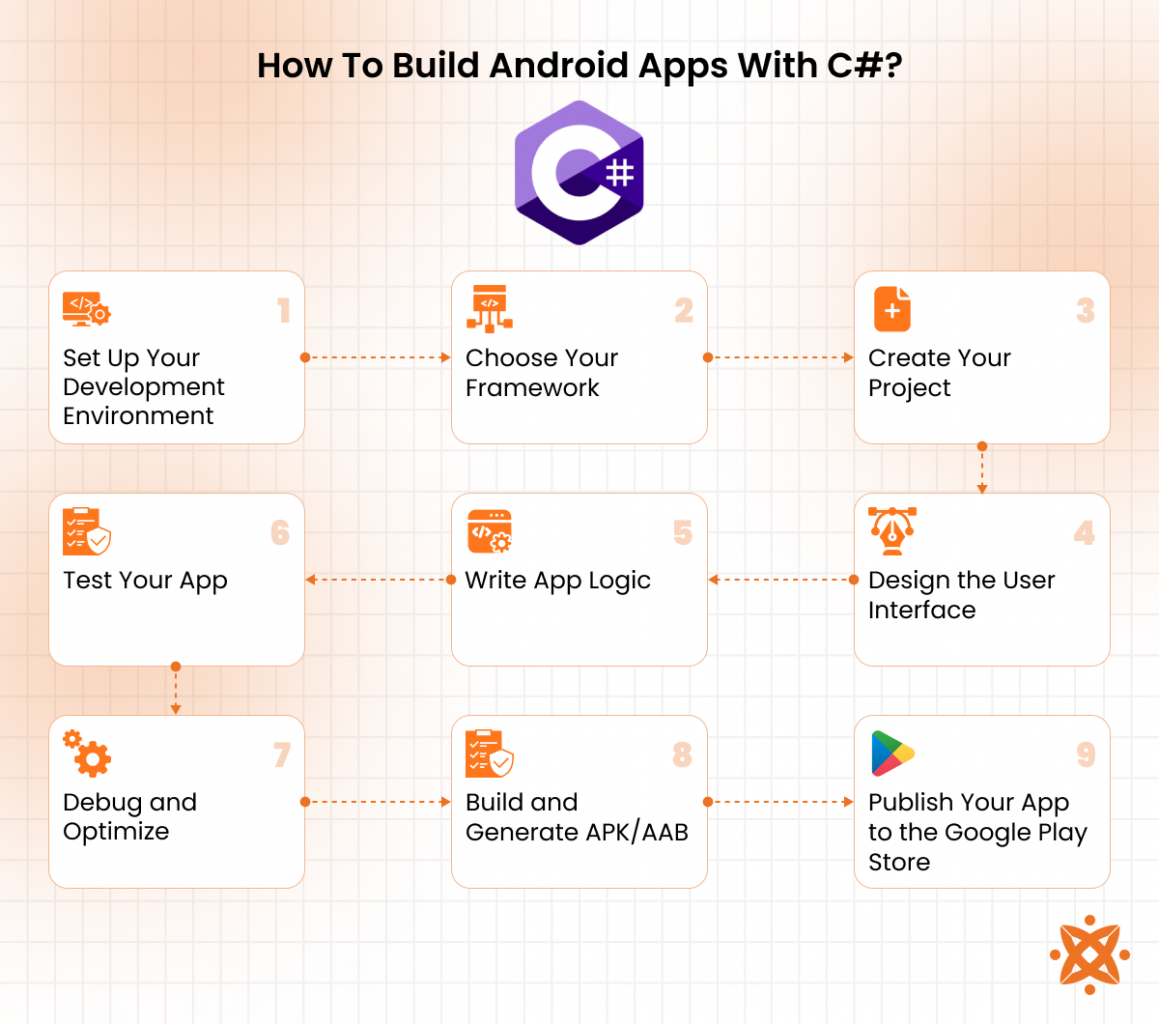
To build Android apps with C#, the steps to follow are:
- Set Up Your Development Environment: Begin by installing Visual Studio, the primary IDE for C# development, and the Xamarin plugin, which enables cross-platform app development. Xamarin allows you to write Android apps in C# while targeting both Android and iOS platforms. Set up the Android SDK within Visual Studio to enable Android-specific tools and emulators for testing.
- Choose Your Framework: Choose Xamarin for building native Android apps with C#. Xamarin provides the tools to write cross-platform apps in C# while delivering native performance. It also integrates with the Mono runtime, which enables your C# code to run on Android devices.
- Create Your Project: Use Visual Studio's Xamarin.Android template to create a new Android project. This template will set up the project structure, including directories for resources, assets, and code. With Xamarin, you create both cross-platform and Android-specific apps by adjusting your project configuration.
- Design the User Interface: Design the UI using Xamarin.Forms or Xamarin.Android. Xamarin.Forms allows for creating shared UIs across platforms, while Xamarin.Android is used to design native UIs specific to Android. Xamarin provides tools to design interfaces directly in Visual Studio, using XAML or programmatically in C#.
- Write App Logic: Write the app's logic in C#. Use C# classes and methods to control app functionality, data management, and user interactions. Xamarin allows seamless integration with Android APIs, letting you access device features such as camera, location, and sensors directly from C# code.
- Test Your App: Use Android emulators or real devices to test your app. Visual Studio provides a built-in Android emulator, but testing on physical devices is recommended to ensure the app performs as expected. Always check your app for compatibility with various Android versions and screen sizes.
- Debug and Optimize: Debug the app using Visual Studio's built-in debugger and logging features. Monitor memory usage, CPU load, and other performance metrics to ensure your app runs smoothly. Xamarin also provides profiling tools to detect memory leaks and other performance bottlenecks.
- Build and Generate APK/AAB: Once the app is tested and optimized, build the APK or AAB file using Visual Studio. Xamarin provides the necessary tools to package your app as an APK or AAB. Ensure the generated files are correctly signed and ready for submission to the Play Store.
- Publish Your App to the Google Play Store: After building the APK or AAB, create a developer account on the Google Play Store, upload your app's file, and fill in the app details. Submit the app for review, and once approved, it will be available for download on Android devices worldwide.
Never Miss an Update From Us!
Sign up now and get notified when we publish a new article!
Dhaval Sarvaiya
Co-Founder
Hey there. I am Dhaval Sarvaiya, one of the Founders of Intelivita. Intelivita is a mobile app development company that helps companies achieve the goal of Digital Transformation. I help Enterprises and Startups overcome their Digital Transformation and mobile app development challenges with the might of on-demand solutions powered by cutting-edge technology.
